Tutorial for Startups: How to remove object from image (photoshop)
Startups founders don’t need to be graphic designers to do basic edits on company photos – one can easily make small image edits that make a big difference – with a little help from Startup Life contributor Julian Choi.
Most startups go through periods with limited (or no) funds, but that shouldn’t have to affect the business’ online presence. While some imagery needs heavy work or editing – in which case you really should hire a designer – most smaller imperfections can be edited out by anyone, no special skills needed.
This tutorial offers three different ways to edit out imperfections from, for example, a social media image using Adobe Photoshop (if you’re really lazy – head down to the bottom to watch the video tutorial!).
Consider the following scenario:
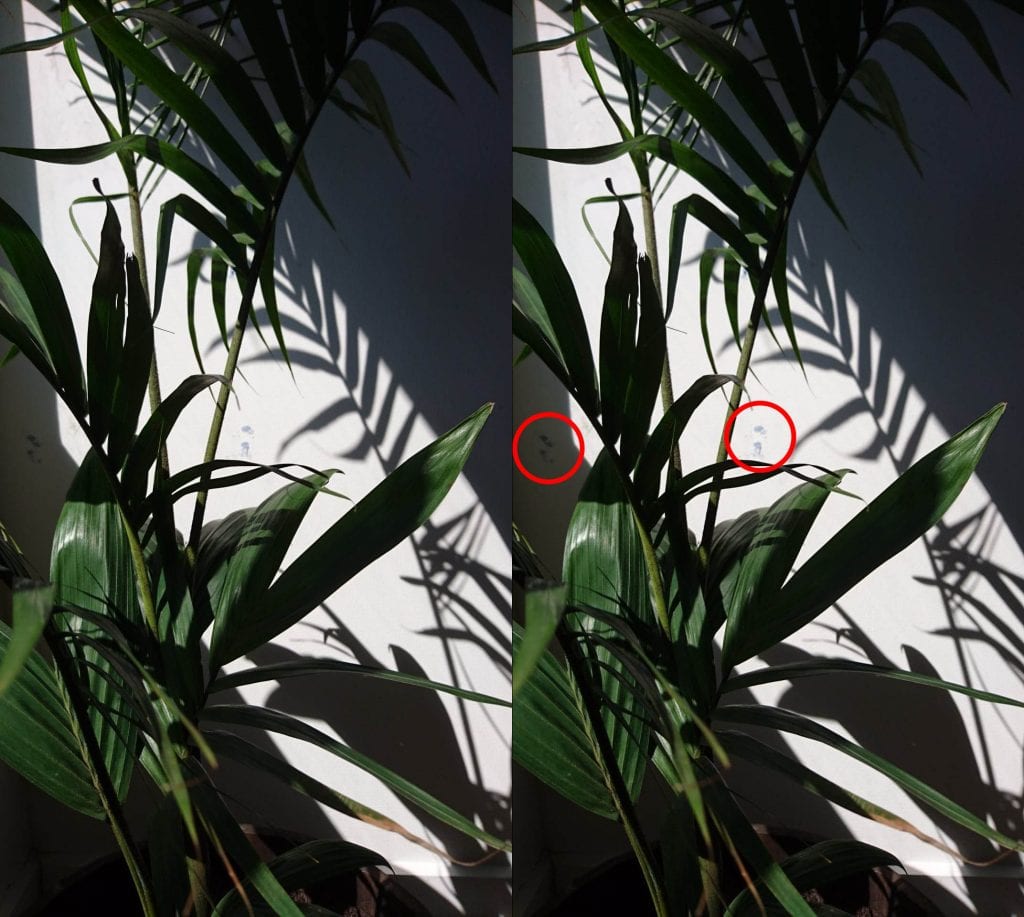
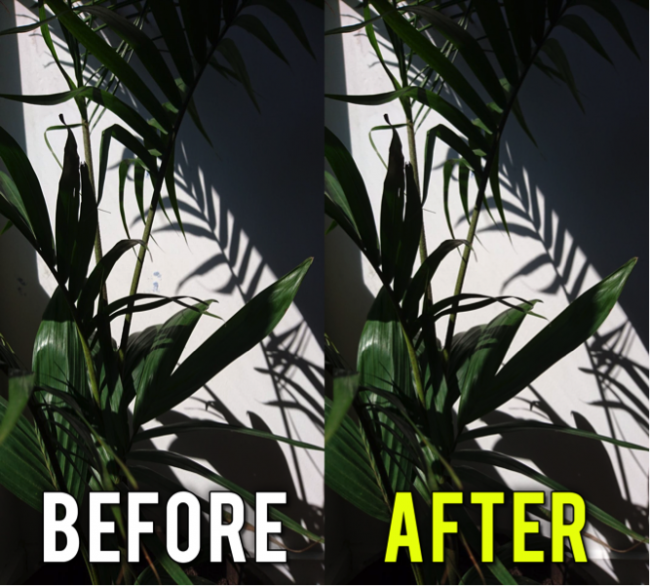
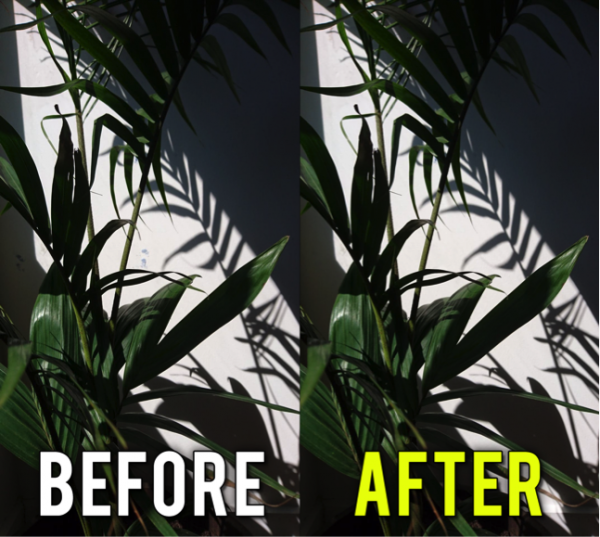
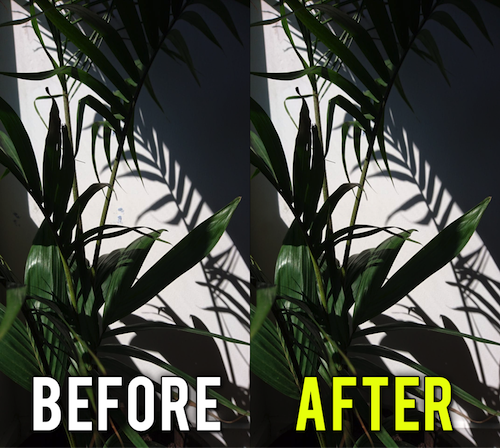
I’ve got this amazing photo that I want to use on the front cover of my website.
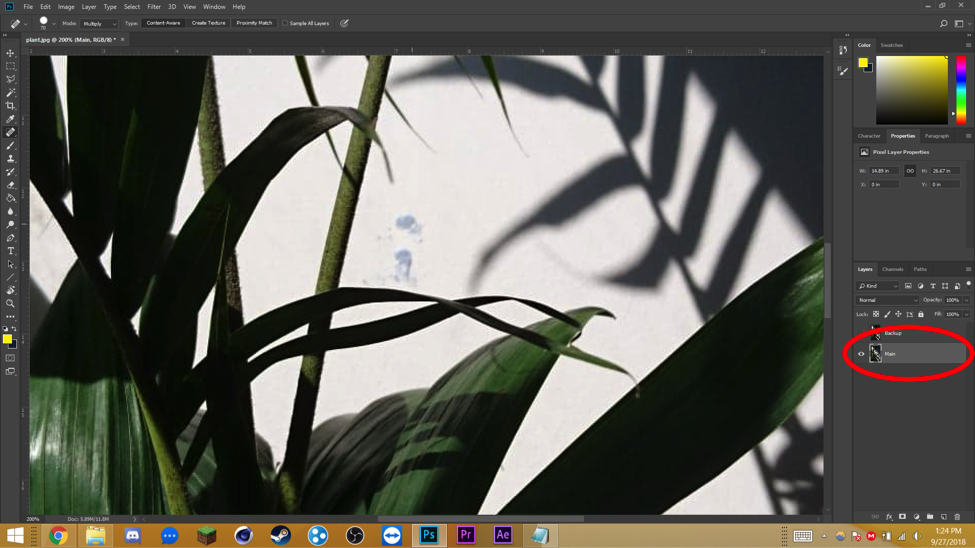
The only problem is, that there are two annoying pieces of blue-tac on the wall, that I really don’t want to be there (see photo below). Luckily, I have photoshop and I know of 3 easy ways to remove things that I don’t want from my photo.
What you need for this tutorial:
– Adobe Photoshop (CC 2018) You can purchase a license from Adobe or download it for free for a 30-day trial
– A photo that you’d like to edit
Get Started: How to open and prepare the image in Photoshop
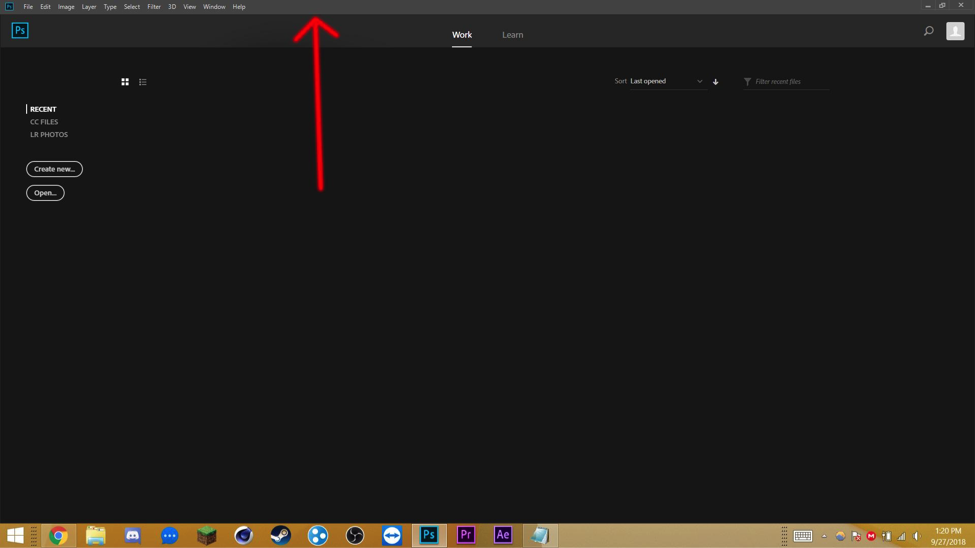
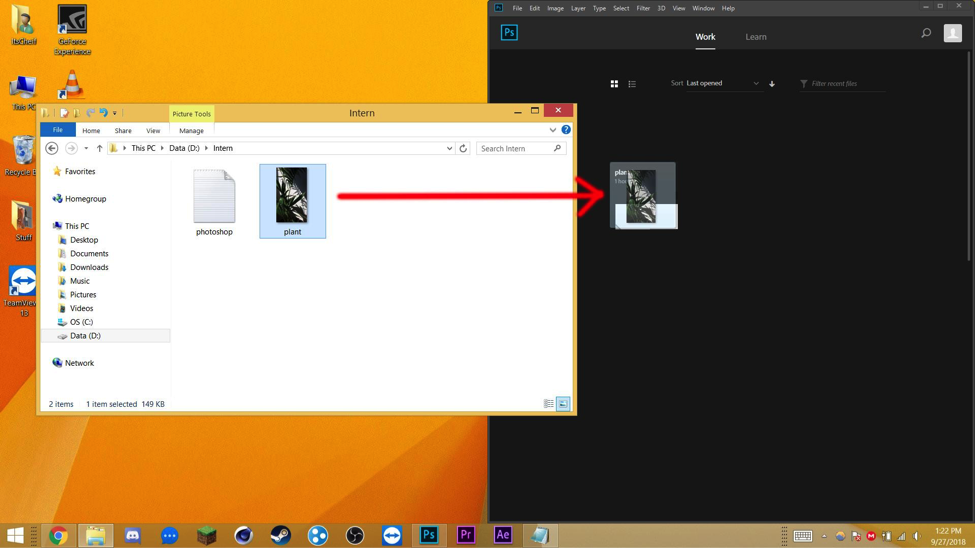
1. Launch the Photoshop app, click the bar on the top and drag Photoshop to the side. It should then automatically snap out of the full-screen mode (see the second image below).
2. Drag the desired photo into Photoshop and it should automatically open.
3. Click and drag the bar on your photoshop window and move it to the top, this will cause Photoshop to take up your full screen again.
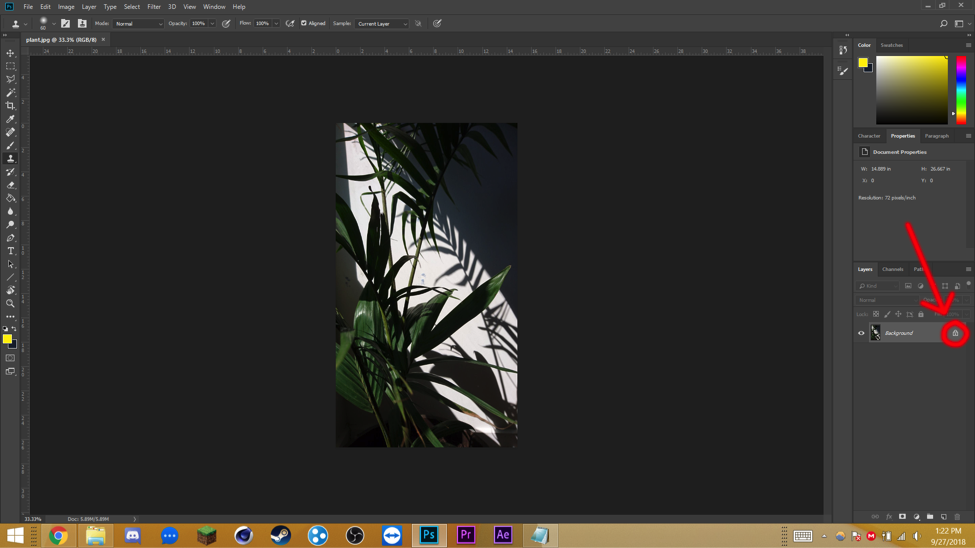
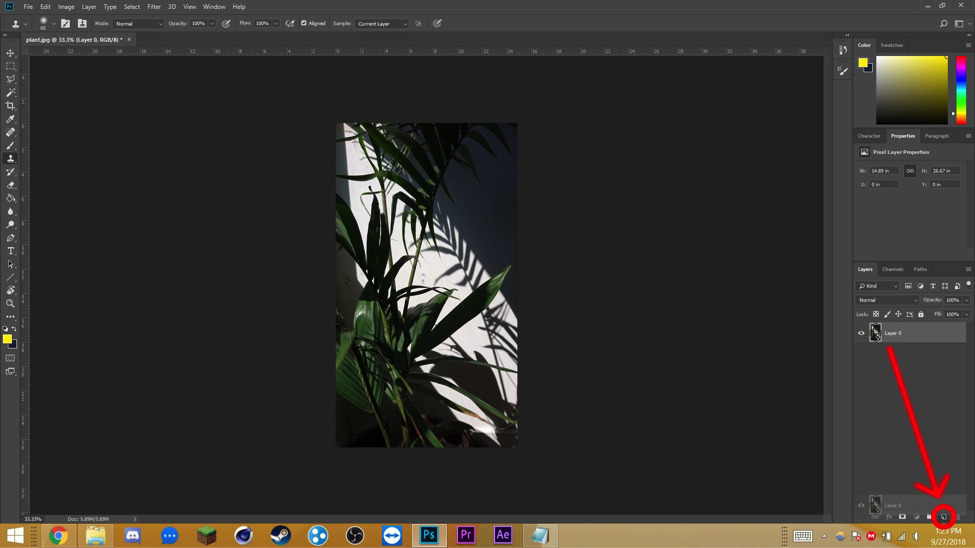
4. Before we start messing around with the photo, it’s a good idea to unlock the layer by clicking on this Lock in the layer panel.
5. Click and drag the layer to this New layer button here. This will duplicate the layer and serve as a backup in case anything goes wrong.
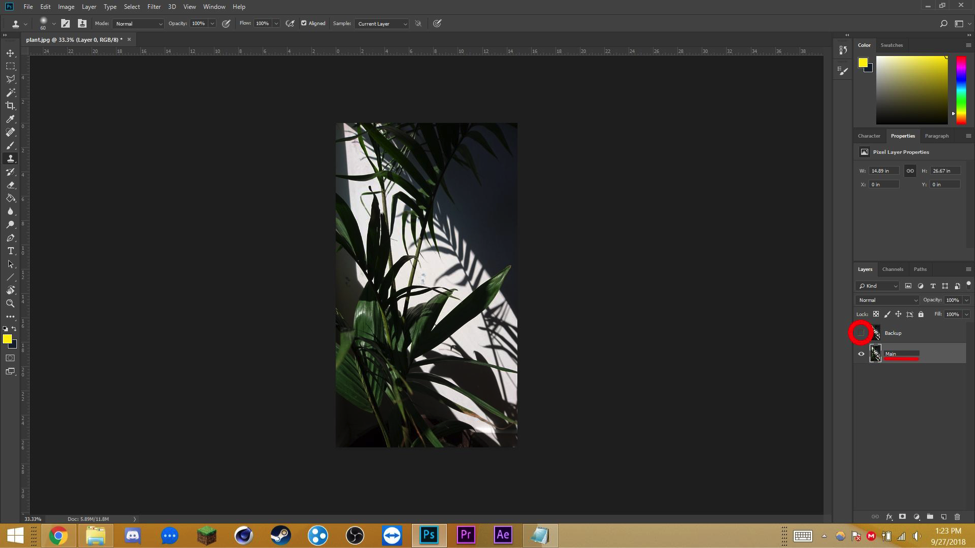
6. Click on this Eyeball here to hide the layer. It’s also in good practice to double-click on your layer name to rename the hidden one to “backup” and the visible one to “main”, to keep things more organized.
Now we can diverge into the three ways to remove something from your photos.
1. Press the J key to use the Spot Heal Tool – This tool is good for removing, spots, blemishes, or imperfections.
2. With the main layer selected, simply click on the spots you want to remove, and photoshop should be able to remove it.
If you need to zoom into your document, holding alt and scrolling should do the job. Otherwise, pressing Ctrl + + key OR Ctrl + – key should do the trick.
You can increase the brush size by pressing ] Key and decrease the brush size by pressing the [ Key.
Should you make a mistake, the shortcut for undo is ctrl + z. Should you find that you’ve made a series of mistakes, the shortcut to undo further is ctrl + alt + z.
This is by far the easiest and fastest technique, here’s what the final looks like:
If, for example, the first method using the Spot heal tool didn’t work as well as you’d hoped, the second method offers you more control.
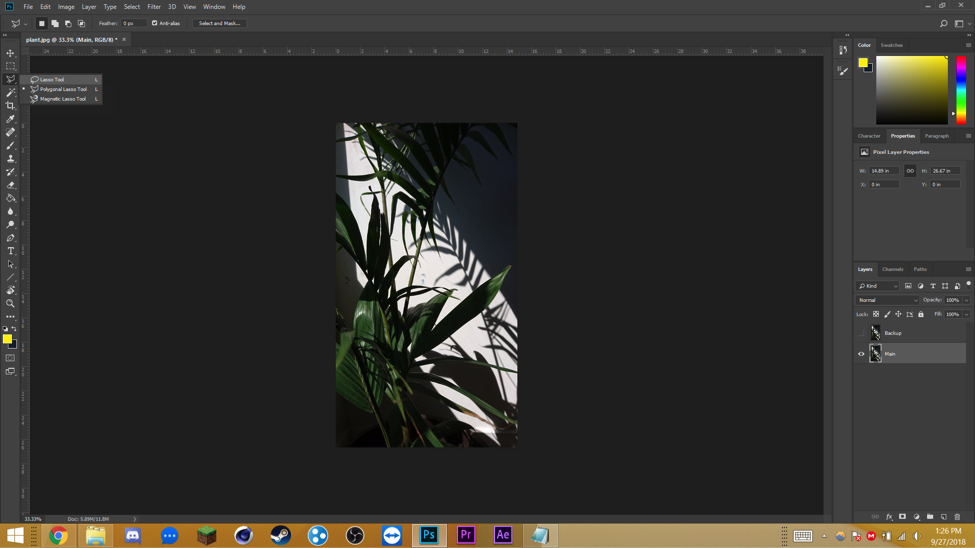
1. Press the L key on your keyboard to use the Polygonal Lasso Selection tool – this tool allows you to create selection regions in any polygonal shape. If your icon doesn’t quite look like mine, click and hold this icon to open up a drop-down menu, there, you can select the Polygonal Lasso tool.
2. Using the lasso tool, select the areas you want to remove one at a time; in my case, I’d select the blue tac in the light first, then the one in the shadow- not both simultaneously.
Every time you click with the lasso tool, it creates a point. You need to create points all around the area that you wish to select and link it back to the first point. You’ll know you’ve hit the origin when your cursor changes to this lasso with a circle.
If you mess up while creating the selection, you can hit esc key at any time to try again.
The selection doesn’t need to be exact, but shouldn’t be too far off either.
 A dashed line will show your selection once you’re done.
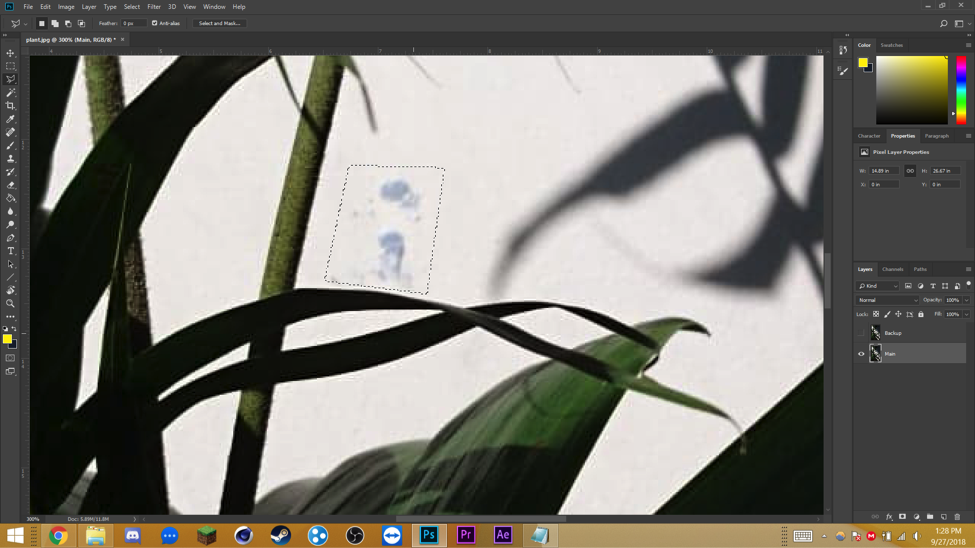 If you are unsatisfied with your selection, hit Ctrl + D to cancel out the selection and try again.
3. Press Shift + f5 to open up the fill dialogue box. Make sure the fill method is set to Content aware in the content drop down menu in the box.
Content aware fill looks at the area around your selection and tries to fill in your selection as if it were an empty spot.
Hit enter and the filling process should begin. It could take a second or a minute depending on how complex your photo is.
The third and final way to remove something from your photo requires the most effort and user input.
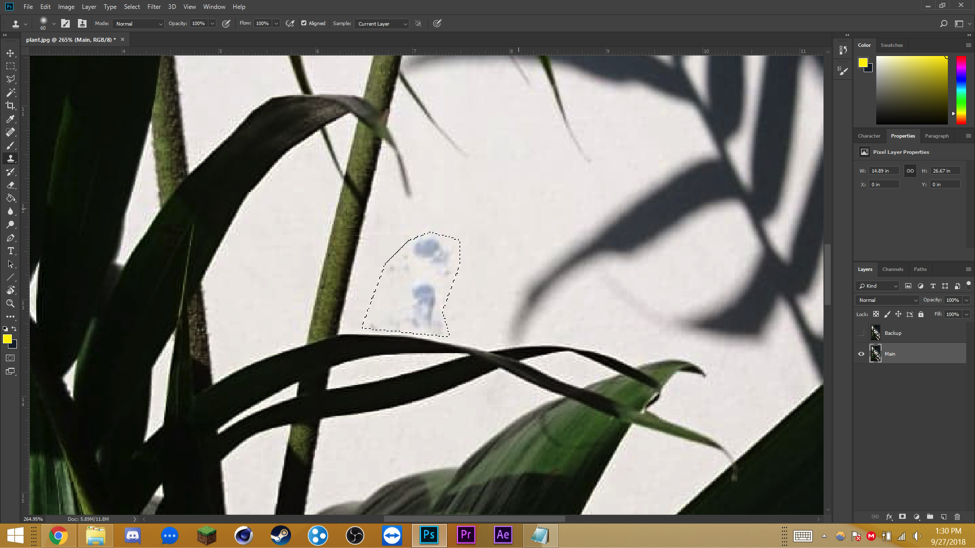
1. Use the Lasso tool from the previous method to draw a selection around the area you want to remove. The selection is made so that anything you do stays within the selection – as you don’t want to accidentally replace something you didn’t intend to.
2. Press the S key to use the stamp tool. The stamp tool allows you to sample areas of a photo and paste them elsewhere.
3. Hold the alt key for the stamp tool to enter “sampling” mode. While in sampling mode, click somewhere similar to what you want to replace your object with. For example, if I wanted to remove this blue tac in the light, I’d sample this bit of the wall nearby.
Basically, you’re choosing a spot in the image to copy – that you will then paste over the blue-tac that you want to hide.
4. Let go of the alt key to get back into stamp mode – again, the square bracket keys change brush size, use [ key to make it smaller and ] key to make it bigger. Now if you click, you’ll paste the sampled area. This is where you are “pasting” the selection that you copied earlier.
5. Effectively, what I’ve done is replace the blue tac on the wall with another part of the wall, giving the illusion that the blue tac was never there in the first place.
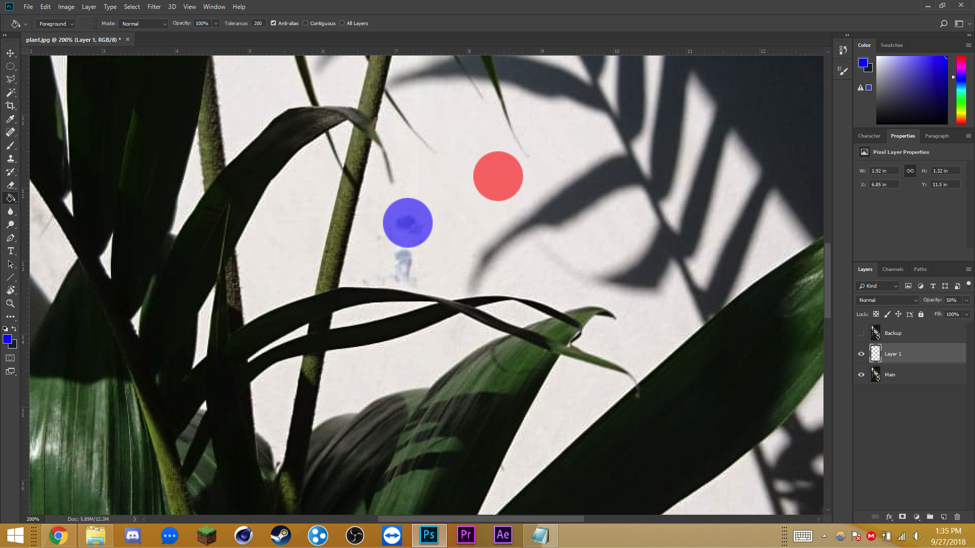
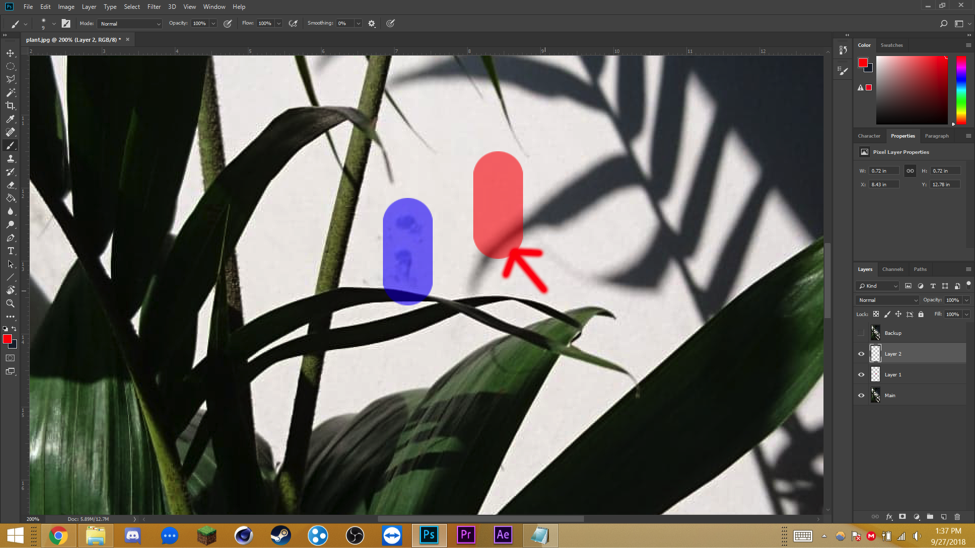
To break down exactly how the stamp tool works, I’ll use red to represent the sampled area, and blue to represent the pasted area.
Before you paste any of the samples, the sample follows your cursor at all times, once pasted, however, the sample stays in place.
This causes a problem if an unwanted object makes its way into your samples.
Fortunately, the solution is easy- simply resample the area and repeat until satisfied.
Once you’re done, hit Ctrl + D to cancel out the selection and view your full image.
In this case, my final result looks good – but if yours has a clearly defined edge that you want to get rid of, you can use the spot heal tool from method number 1 to clean up the edges.
…and there you go. Your image is now perfect and can represent your business or startup in a professional manner.
For live instructions, watch Julian’s video:
If you have any requests for further tutorials from any of our many experts and contributors – leave a comment in the section below.
Julian Choi
Latest posts by Julian Choi (see all)
- From YouTube to speaking at PAX – the philosophy that changed my career - November 7, 2018
- Tutorial for Startups: How to remove object from image (photoshop) - October 31, 2018
You may be interested

Discover Modern Man’s Lifestyle
Ellen Must - June 1, 2022https://youtu.be/pCA0sS1oAJE Being an Australian man has never been more challenging. The modern Australian male juggles work and family, runs marathons, volunteers in a charity, fishes, plays golf…

Being a stay-at-home parent or hiring a nanny
Ellen Must - June 1, 2022https://youtu.be/UKeX6AyiUWY Having a child is never an easy thing to do. Whether you’re on baby number one or baby number five, there are still so many things…

Ways to encourage staff to return to the office
Ellen Must - May 30, 2022It's early March 2020, we're finally past the season of crazy bush fires, the world seems peaceful, and you're on your way to your 9-5 in the…


